List Layouts
Often when you are looking to view data, this is done through a list. Within Servicely lists are configurable per aspect, per Table and can even have their own columns for specific pages and provide the ability to preview and enter records.
Configuring list layouts
When configuring lists layouts, there are a few ways to do so. However there is only one method that is recommended. This is consistent between aspects or otherwise, as when configuring aspects, it would just mean going directly to that aspect's list URL and doing the same steps.
Default view
To change the list layout of the default view navigate to the default list view ==>
https://demo-instance.servicely.ai/#/Ticket
Other views
Any other views can be changed by navigating to the list layout ==>
https://demo-instance.servicely.ai/#/List/Ticket/[Aspect]
[Aspect] = Name of the view, e.g. SelfService
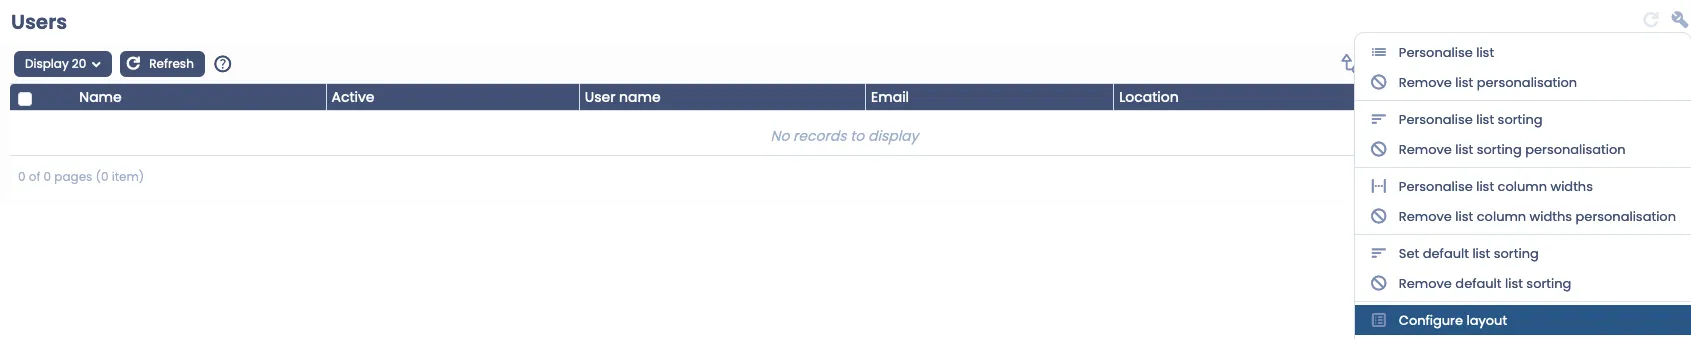
To configure a list layout, click on the wrench on the top right of the screen, as per below:

From here, click on configure layout.
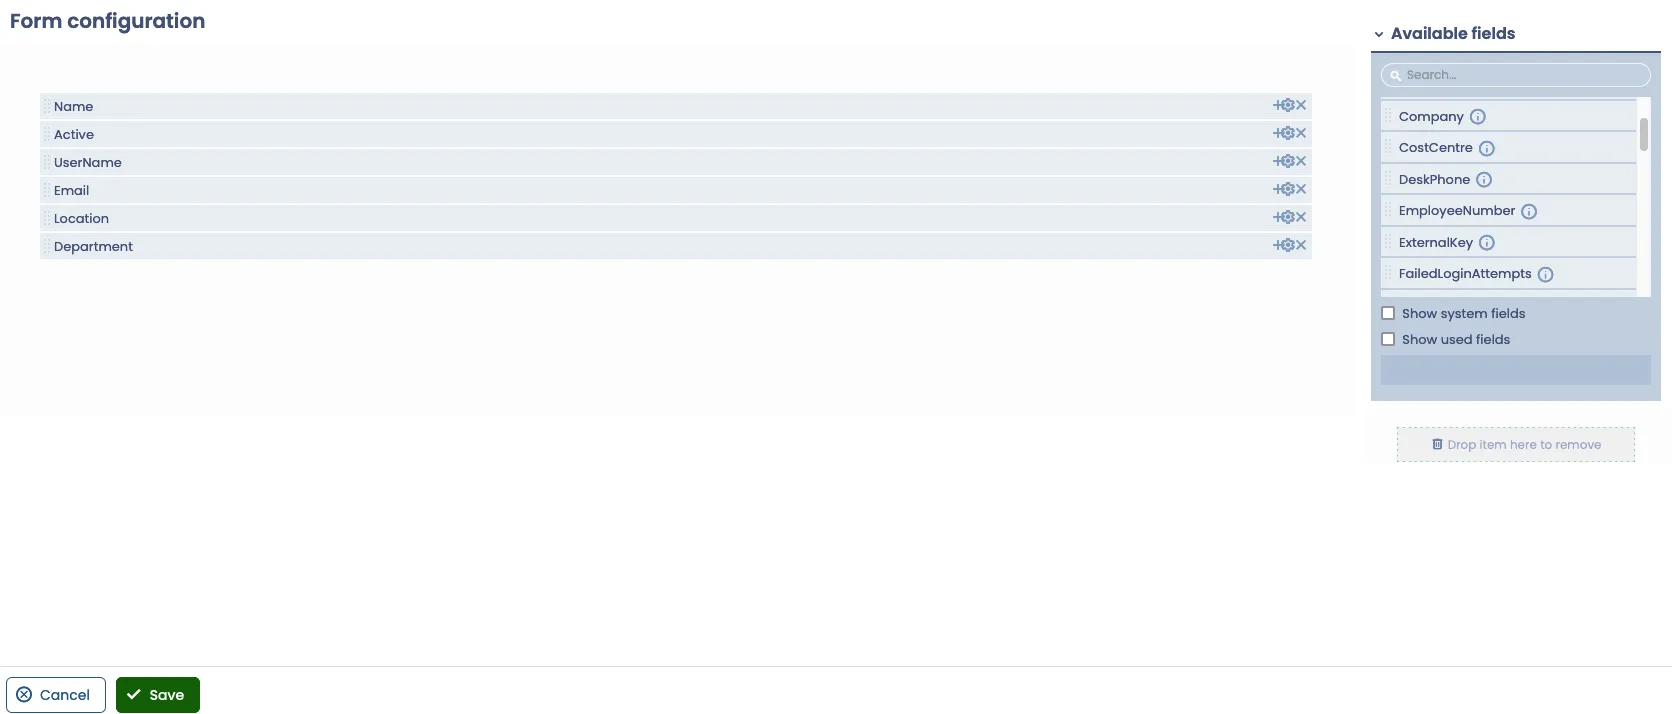
When configuring the list, it is simply a matter of dropping the fields on the list in the order that you want them. The items going up to down, will appear left to right. For example, the above example provided for users has the below example when configuring the list layout.
List functionality
When you are on a list, there are a few different features that are offered to assist in finding the record you need. Note that filtering is detailed below under its own section.
Number of Records Displayed
To use this functionality, you need to be on Version 1.10 or later.
To allow you change the number of records that is displayed by default on the list, you can update the application property system.default_list_view_size. This needs to match an option in the drop down.
Personalise list
You can personalise or override the default settings that System Administrators configured, on the columns that are displayed, just for your user account. The "Personalise list" allows you to do the personalisation, per below:

Decide which fields you want to see as columns, in your personalised list:
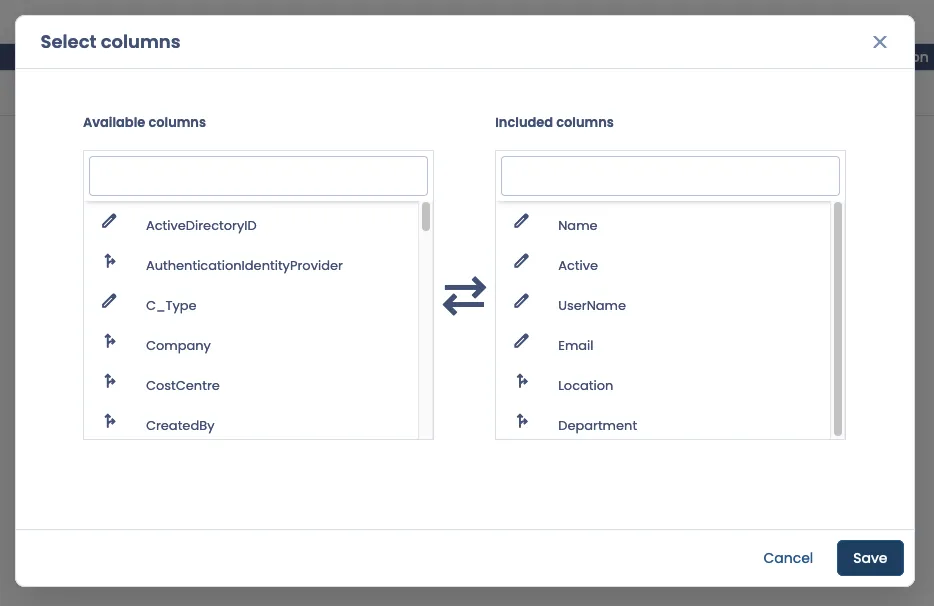
To remove your list personalisation and go back to use the default list configuration, click on "Remove list personalisation" submenu under the wrench icon.
Personalise list sorting
You can personalise the default sort of the list view, overriding what the System Administrator has set for that list, just for your user account. The "Personalise list sorting" allows you to do the personalisation, per below:

The example below shows the personalised list will sort descending on UpdatedOn field and ascending on FirstName
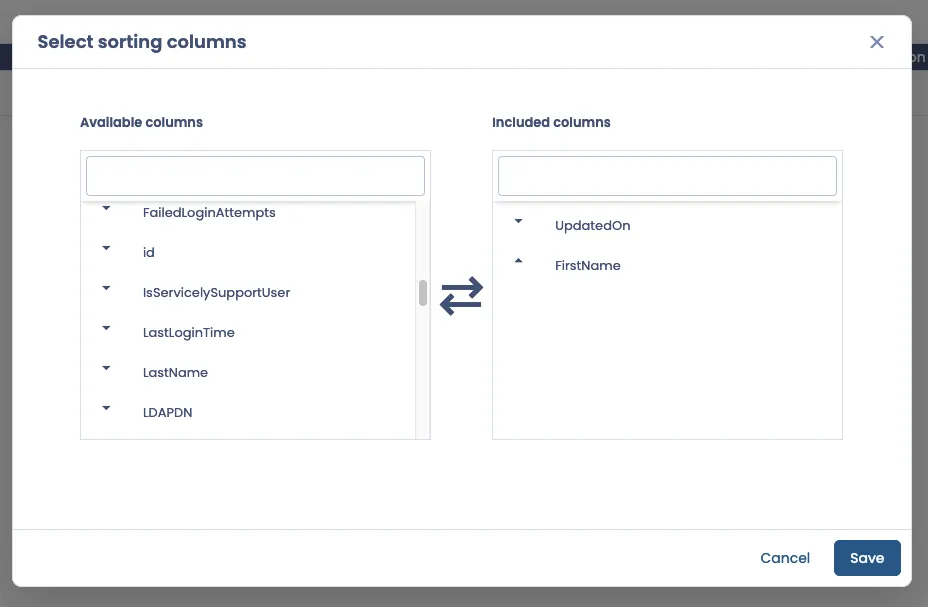
To remove your list sorting personalisation and go back to use the default list sorting, click on "Remove list sorting personalisation" submenu under the wrench icon.
Sorting records
When you are on a record list, you are able to sort records in an ascending or descending order, depending on what column you click. For example, if you click on name, it will sort in an alphabetical order based on the name. If you click on it again, it will sort reverse alphabetical. Alternatively, you can right click a column and choose a direction that way.
Opening / Previewing records
From a list it is possible to open records and preview records in a few ways.
- Clicking on the eye: For each row / reference field, there will be an eye next to a record if you have permission to read it. By clicking on it, it will provide a preview of the record you are looking at. It is not only a preview however, as you are also able to update the record whilst you are previewing it.

- Double clicking on the eye : For each row / reference field, there will be an eye next to a record if you have permission to read it. If you double click it, it will enter the record.
- Clicking on the display value: When you look at each row, the first column is often the display value of the record. When doing so, it will enter the record.
- Right clicking on row and pressing "Open record": If you right click on a row, a menu will come up and have a menu item called "Open record". If you press on this, it will enter the record.
- Right clicking on row and pressing "Open record in new window": If you right click on a row, a menu will come up and have a menu item called "Open record in new window". If you press on this, it will open the record in a new window or tab (depending on your browser).
Deleting records
From a list, you are also able to delete records if you have the required permissions. This is simply done by right clicking a record row and pressing "Delete". It will ask for your confirmation to ensure it actually should be done.
Quick filters
From a list, there are also two quick filter opens when you right click a row. These options are "Include this" and "Exclude this". By right clicking on a specific column or a specific row, it will automatically add a filter to include / exclude matching values that you have clicked.
An example of this is looking at an Incident list. If you right click a specific classification, and press include this, it would then add a filter "Classification is , whilst pressing exclude this will be the opposite "Classification is not .
You do not have to apply the filter for it to take effect, as it will automatically once you click that option.
Exporting
From a list, it is also possible to export the records that you currently have filtered in a few different formats. The records that will be exported will be the records that meet the filter and the columns that are being shown on the list layout. This will export all records that meet the filter, so if there are 50 pages, all 50 pages of records will be exported. The file name will default to the Table name, with the date and time appended to it. The formats that you can export in are:
- Copy to clipboard: By selecting copy to clipboard, it will add the records to your clipboard that you can paste anywhere. If you paste in an excel document, it will add it to that excel document, the same way it would if you download the excel file.
- Download CSV: This will download a file in a .CSV format
- Download Excel: It should be noted that this will be the .xslx format.
- Download PDF: This will download in a .pdf format. It should be noted however that it will be in a vertical format, so if you have too many columns, it will not export correctly.